
A lot of our support tickets naturally revolve around Account Management & Billing questions, which is to be expected. Behind the scenes, Reclaim Hosting uses WHMCS for all Shared Hosting billing, as well as Domain of One’s Own schools to automatically create cPanel accounts when invoices are marked as paid. There are scenarios where our support team needs to be notified when a specific invoice is marked as paid so additional work can happen. Examples of why notifications are helpful include:
- waiting for a paid invoice in order to begin a site migration
- manually renewing an account for multiple years
- activating a promo code for a bulk shared hosting invoice
What’s more, we need to be able to say, “hey WHMCS, do not automatically suspend this account for X number of days, regardless of invoice due date” or “while we’re waiting for payment, do not suspend/terminate this account.” This scenario is used often for institutional accounts that have delays with their Purchasing departments and have reached out to our Support team for a due date extension.
By setting up a WHMCS Client Group, assigning that Group to a particular user profile, and then bringing that notification into Slack, we’re able to accomplish all of the above. I just recently to set this up for BYU’s WHMCS as part of their Project Decommissioning (thank you, Gordon, for the idea!) so I thought it would be a great time to share how its done. This workflow is used regularly at Reclaim and could potentially be helpful for future scenarios or DoOO schools. This guide also assumes that you have WHMCS and Slack. At the end of this post, I’ll share a list of documentation I referenced as well.
Step One: Create and Assign a Client Group
In WHMCS, navigate to Setup > Client Groups. For newer versions of WHMCS, this will be under System Settings > Client Groups.

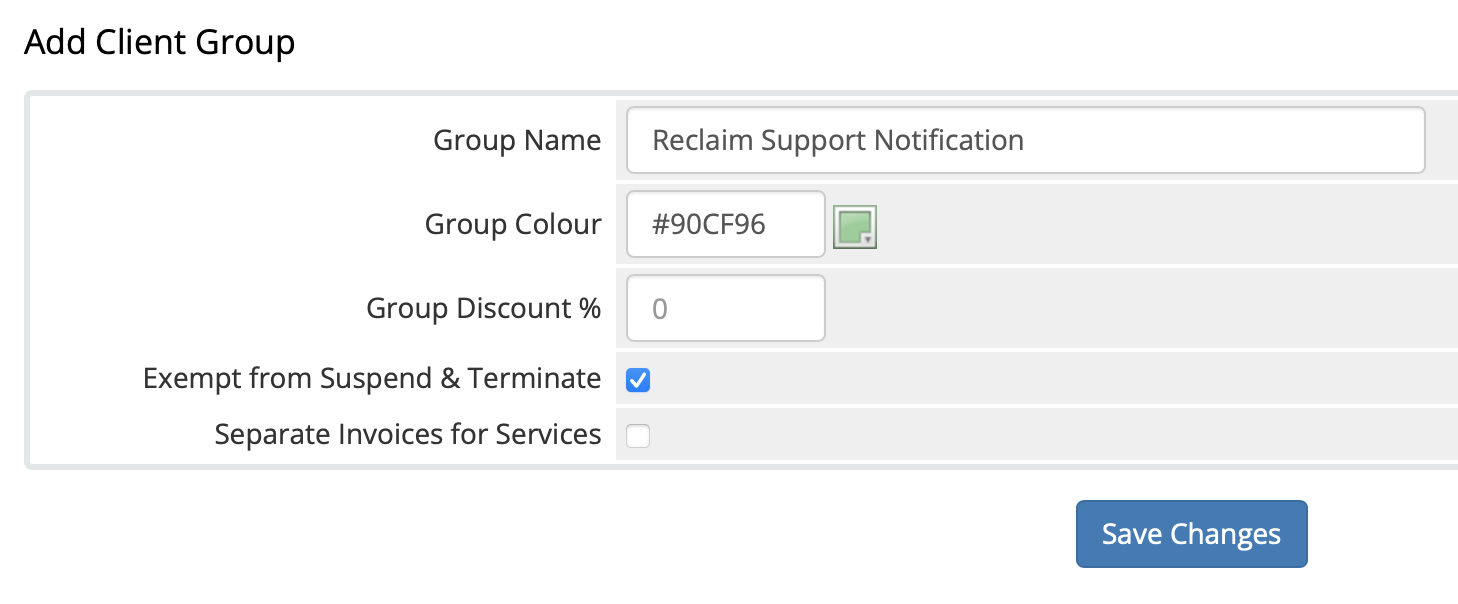
Next, create a new Client Group by filling out the fields under Add Client Group. You’ll want to select a color for the group and check the box for “Exempt from Suspend & Terminate.” Next, click Save Changes.
From here, you can head to any WHMCS user profile, go to the Profile Tab, find the Client Group field, and select your new group from the dropdown menu:

Step Two: Creating an App for Slack
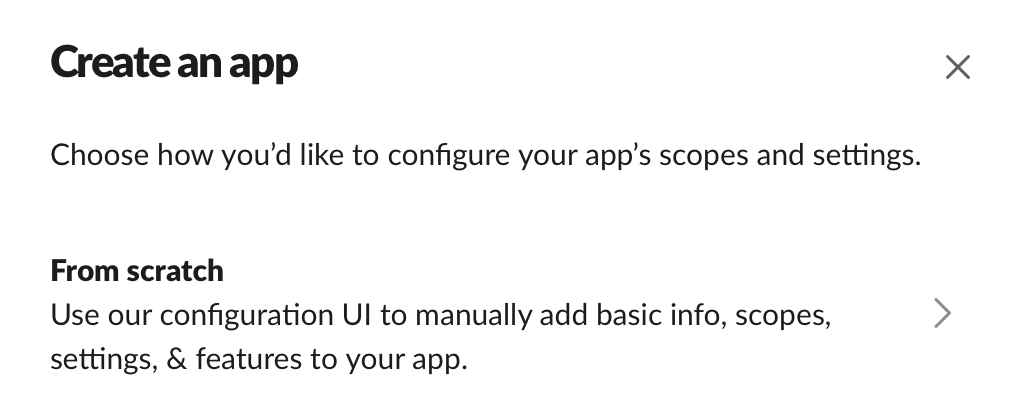
Make sure you’re logged into your Slack account, and then head to api.slack.com. Click Create an app. On the next page, click Create New App, and then select From Scratch as the method for configuring the app.
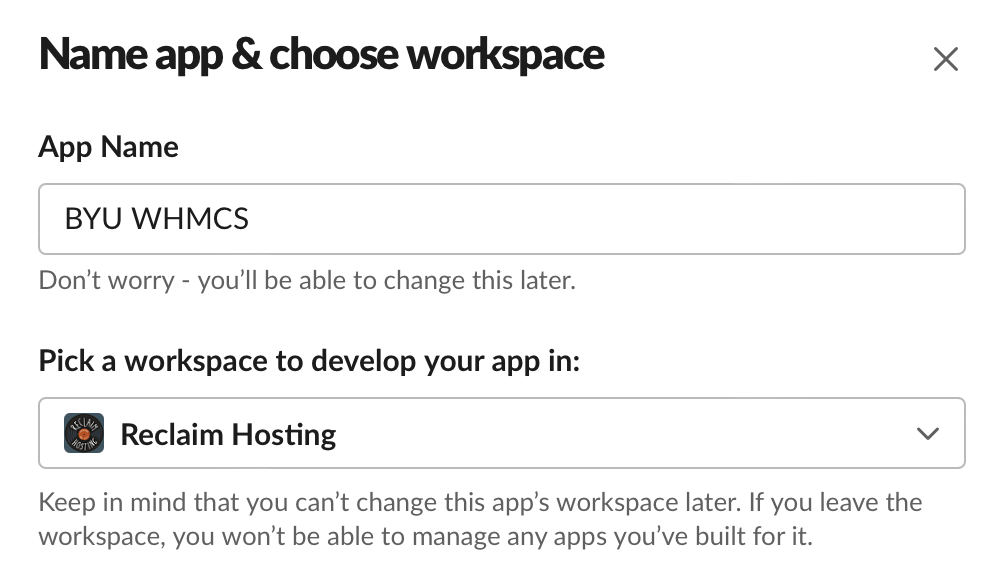
Then give your App a name, and select your Slack workspace. When complete, click Create App.
On the following page, navigate to the Building Apps for Slack > Add Features and Functionality section and then select Permissions.

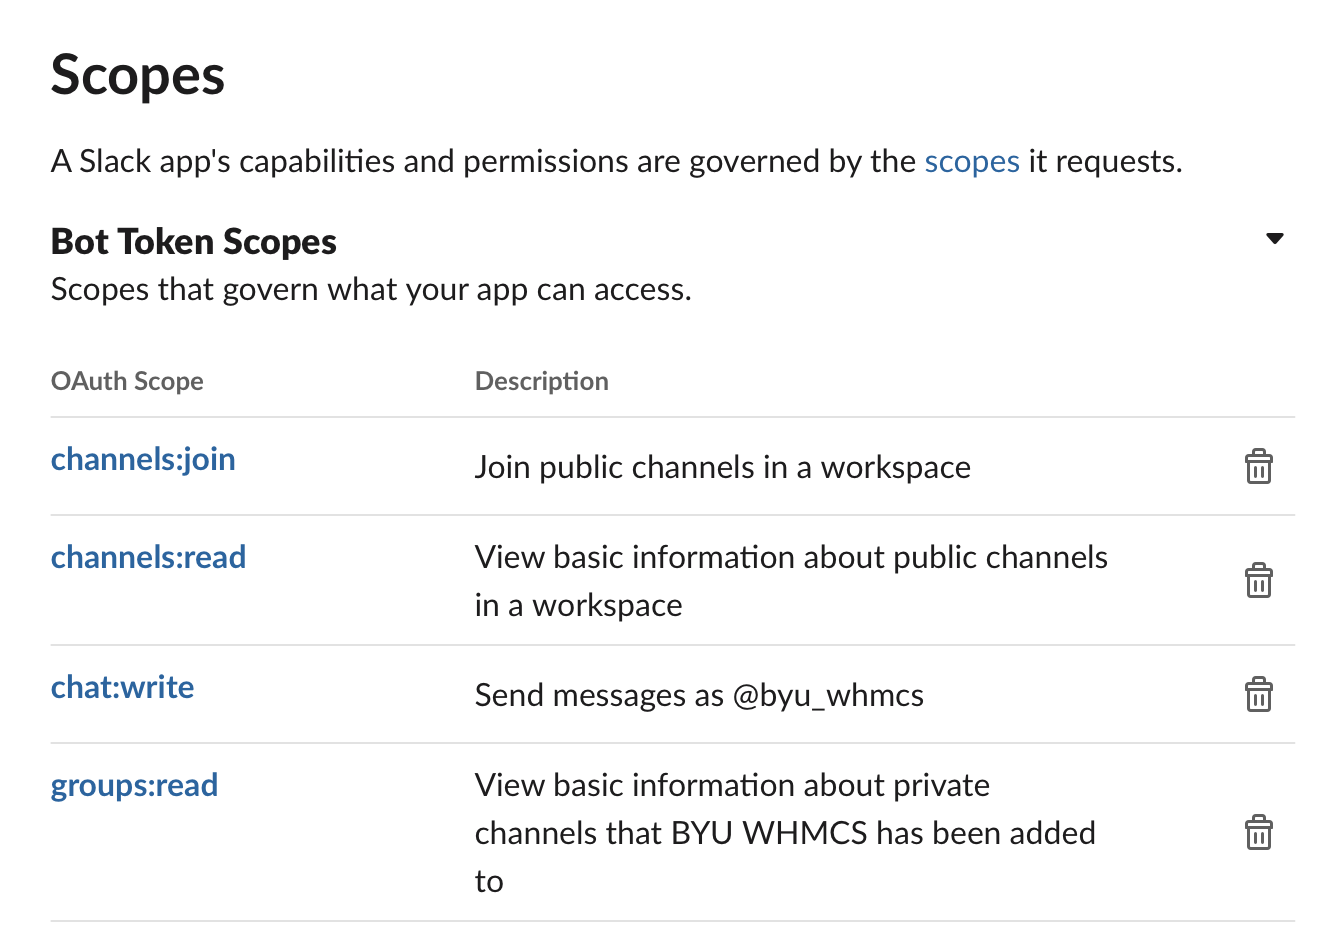
Scroll down to Scopes > Bot Token Scopes, and then select Add an OAuth Scope. Add the following permissions:
1) channels:join 2) channels:read 3) chat:write 4) groups:read
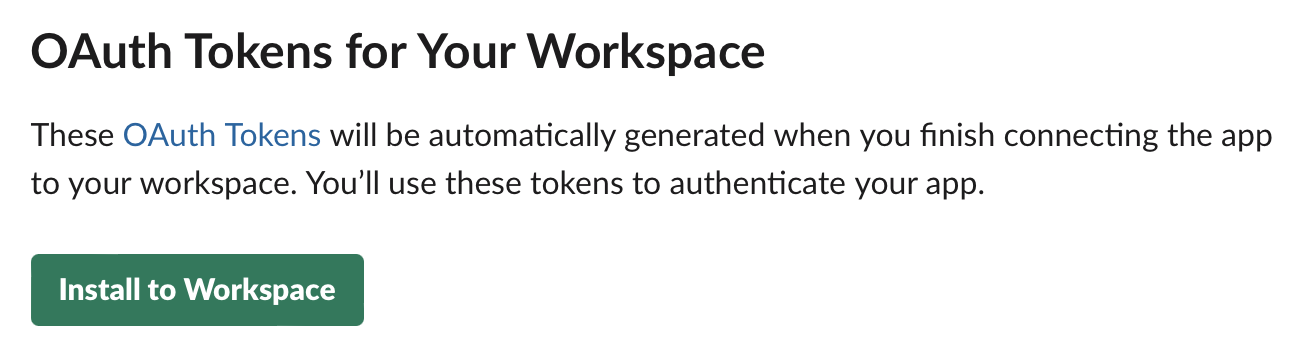
Once complete, scroll back up and click Install App to Workspace. You’ll then want to confirm that you authorize these permissions by clicking Allow on the following page.
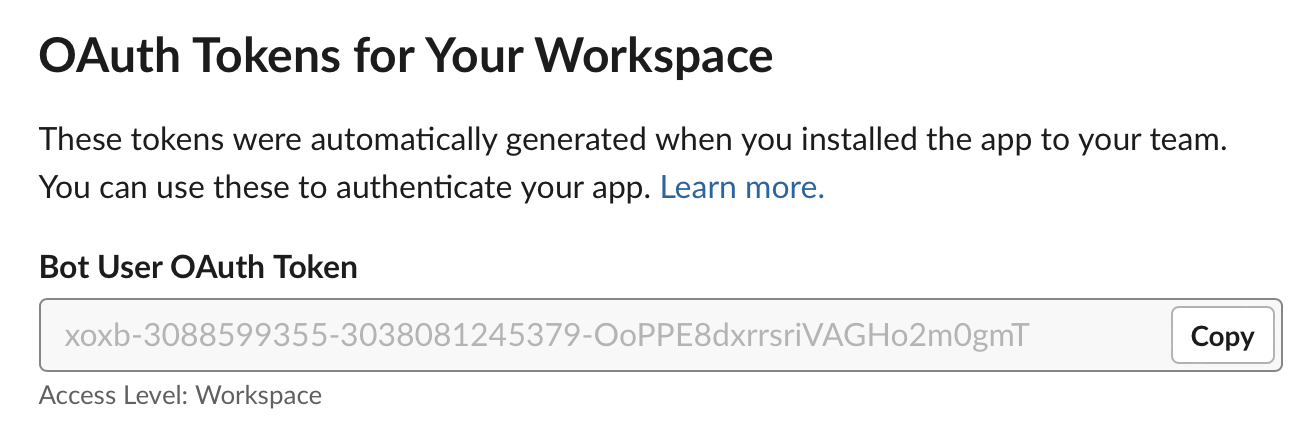
You should now have a new Bot User OAuth Token that has been generated. Copy and save this for later use.
Step Three: Connecting Slack App with WHMCS
Return back to WHMCS and head to Setup > Notifications. For newer versions of WHMCS, this will be under System Settings > Notifications:

On the following page, you’ll see a Slack box. Click Configure. In the next pop-up window, paste your newly created Bot User OAuth Token (which WHMCS is calling OAuth Access Token). Click Save Changes.
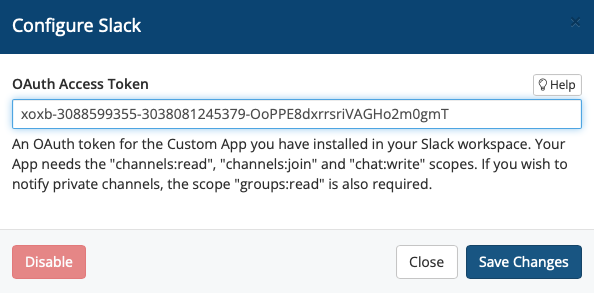
If entered correctly, the popup window will close and you will be ready to proceed with the final step.
Step Four: Creating a WHMCS Notification Rule
This is now where you can set the rules and scenarios the notifications you want to receive from WHMCS. Set the Rule Name, Event, Conditions, and Notification Settings. Once complete, select Save Changes. In order to be notified for paid invoices, this is what I selected:
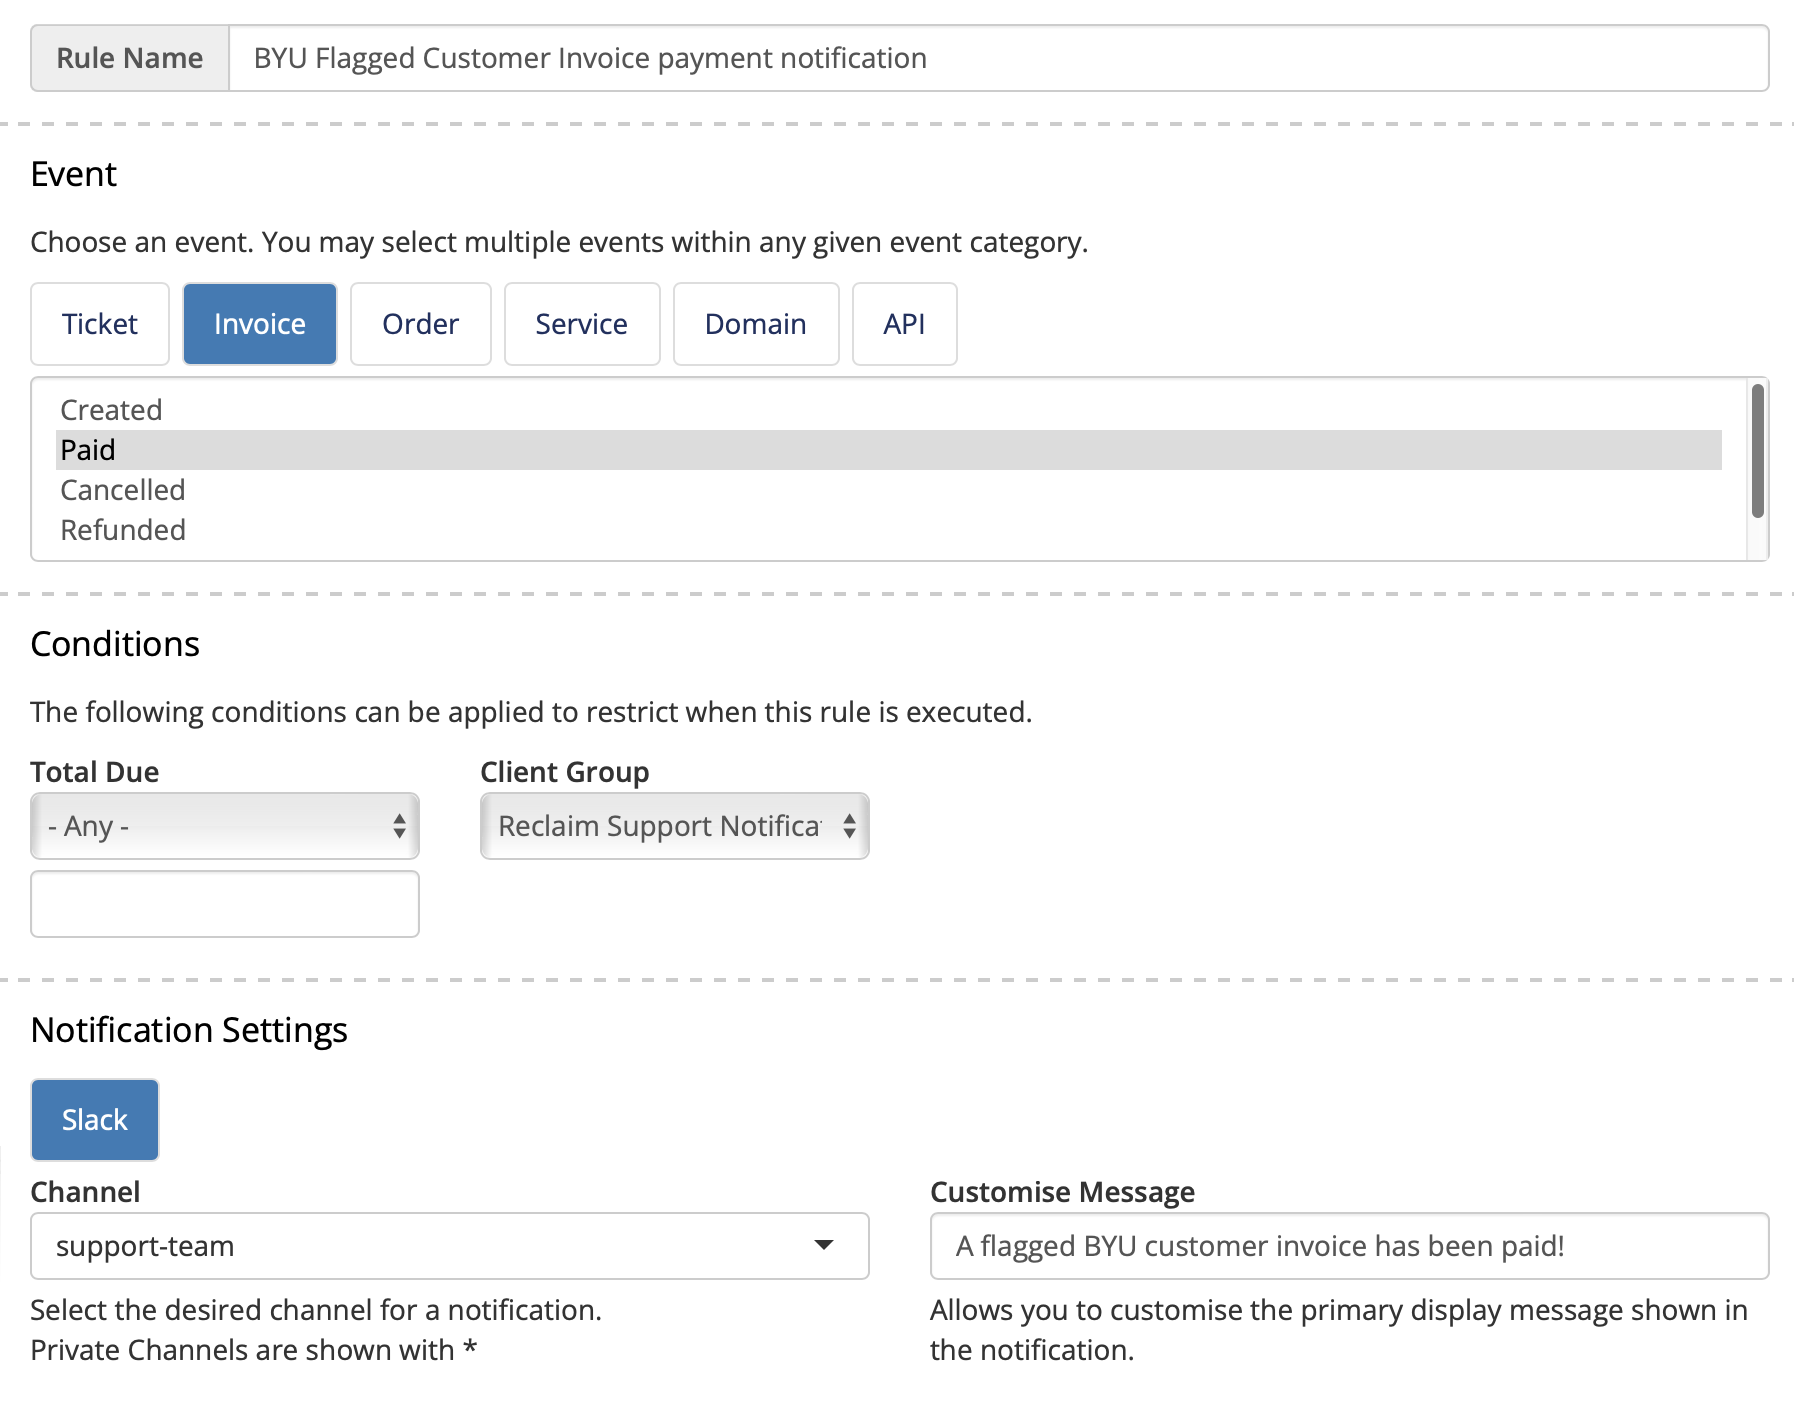
Event: Invoice, Paid
Conditions: Any, Reclaim Support Notification Client Group
Notification Settings: Slack, #support-team Slack Channel, Custom Message for Slack.
Once done, make sure your notification rule is togged On:

Testing and Customizing Slack Notification
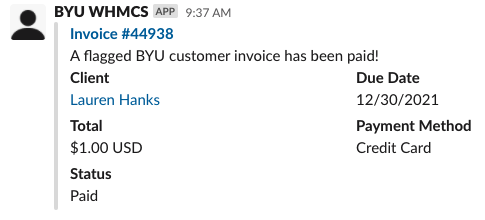
In order to test your new Notification rule, you’ll want to replicate the steps needed in order to trigger the notification in a test WHMCS profile. For me, I simply made sure my test account was assigned to the proper Client Group (step one) and then marked a test invoice as paid. The notification came through in Slack as expected!
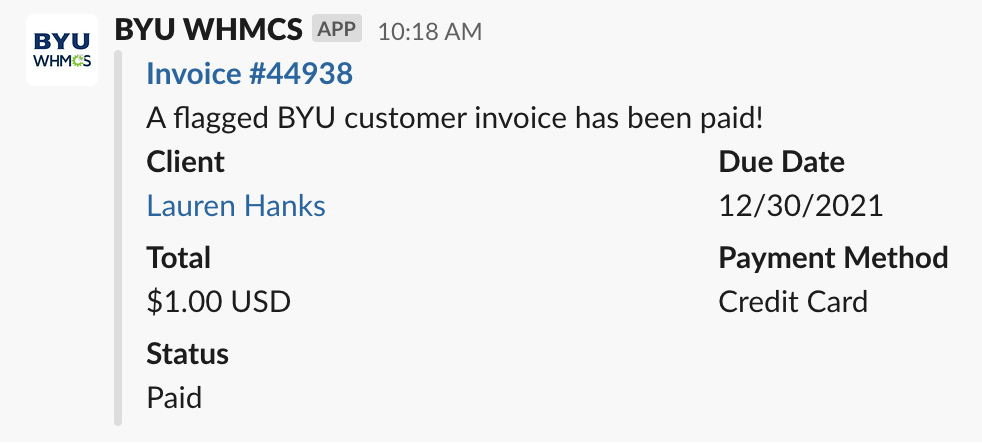
If you want to customize how the notification looks in Slack, that would be done back in the Slack App section from Step Two. Head to api.slack.com/apps and select your newly created Slack App. Scroll down to Display Information and adjust settings for App Name, Description, Background color, and App Icon.

Now you can test the notification once again, and you should see those adjustments added:
All done! If you’re looking for additional reading, here’s a list of relevant documentation: