
Continuing with yesterday’s post about building your website around an HTML5 Up template, I wanted to tackle other features on the site. Yesterday I showed how to go about uploading a template to your file manager, and I explained how to make a few basic changes including editing your browser tab title & fixing how your header title links back to your homepage. I also went over how to add your own custom photos, and how to rename them to match the code in your index.html file.
However labrumfield.com/portfolio (UPDATE: this has now been moved to labrumfield.com/portfolio-test.) still has a glaring issue- currently the about section looks like this:

The generic text is there, yes, but also that contact form is currently leading no where. These items are also resting in the index.html file within my file manager, so that’s where I’ll be.
Unlike something like Python that takes a bit of translating, HTML is pretty straight forward. <section> for example, generally means you’re in a new section… things like that. So you really don’t need to be fluent in HTML to be able to understand it and make changes.
Adding a bio & connecting your social media:
Scroll about 3/4 down your index.html page until you see something like this:
<!-- Footer -->
 <footer id="footer" class="panel">
 <div class="inner split">
 <div>
 <section>
 <h2>Magna feugiat sed adipiscing</h2>
 <p>Nulla consequat, ex ut suscipit rutrum, mi...
This section is the beginning of the footer. Notice where the generic text is in the code in relevance to the screenshot. I went ahead and edited my text to look like this:
<section>
 <h2>About Lauren</h2>
 <p>Hello there, my name is Lauren Brumfield. I am the Operations Manager at Reclaim Hosting. This is a test page using a HTML5 UP template. </p>
 </section>
Here’s how that translates over on the live version:

To add links to the social media icons, you’ll want to change the following section from this:
<li><a href="#" class="icon fa-twitter"><span class="label">Twitter</span></a></li>
To this:
<li><a href="http://twitter.com/Brumface" class="icon fa-twitter"><span class="label">Twitter</span></a></li>
That’s all it takes!
Connecting your contact form:
Setting up a contact form inside a static HTML page is pretty simple. I suppose there are a couple ways of doing it, but I’m going to use Formspree. It’s completely free, and you don’t have to sign up for anything. They take you through the steps of setting it up, but I’ll go ahead and walk through it here, too.
This is the code for my contact form:
<form method="post" action="#">
 <div class="field half first">
 <input type="text" name="name" id="name" placeholder="Name" />
 </div>
 <div class="field half">
 <input type="text" name="email" id="email" placeholder="Email" />
 </div>
 <div class="field">
 <textarea name="message" id="message" rows="4" placeholder="Message"></textarea>
 </div>
 <ul class="actions">
 <li><input type="submit" value="Send" class="special" /></li>
 <li><input type="reset" value="Reset" /></li>
 </ul>
 </form>
Formspree asks me to change the action attribute to https://formspree.io/your@email.com. (^In place of the # sign above.) So it will look something like this:
<form method="post" action="https://formspree.io/lauren@reclaimhosting.com">
(Go ahead and save your changes!) Formspree then wants us to make sure that every section of the form as a name attribute. If you’re using a HTML5 UP template, this should already be done for you. (Reference the italicized name attributes in the code.)
The next step now to getting our contact form connected is we’ll need to go in and confirm the email address to which all of the future messages will be sent. This is done by filling out the form on the live site & clicking send.
You will be taken to the following screen:
Log in to the email that you connected to and click Confirm Form:

You will be taken to the following page:

It’s as simple as that, folks! Now all messages sent from the contact form will go directly to your inbox without hesitation.
It’s all in the details:
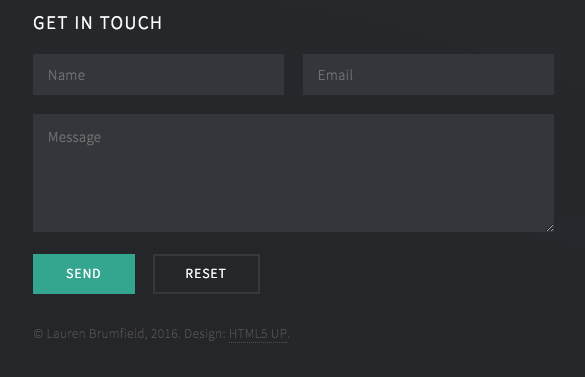
Let’s say that as a final step, you want to tweak the copyright notice at the bottom of your footer. You’ve written a long bio, and adding the final copyright notice line makes an ugly scroll bar appear. #nothankyou.
To fix this, we’re going to move the copyright text to the section under the contact form where there’s more room. This is the code that you’ll want to move:
<p class="copyright"> © Unttled. Design: <a href="http://html5up.net">HTML5 UP</a>. </p>
While we’re at it, go ahead and change the text, too.
<p class="copyright"> © Lauren Brumfield. Design: <a href="http://html5up.net">HTML5 UP</a>. </p>
Here’s where you’ll want to put it:
^Right after the form ends, but right before the section ends. (You could put it after the section ends as well, but that adds a little bit of extra space, which in this case, is what we’re trying to get rid of.)
So now your code should look like this:

And finally, save your changes again & refresh the live page so see what it looks like. Boom!
