

Newest app worth looking into: Annotate
I’ve been using this app for a couple of months, per Tim‘s discovery, and it rocks. As both the title of this post and the tagline of the app suggest, Annotate really does change the name of the game in the world of screenshotting.

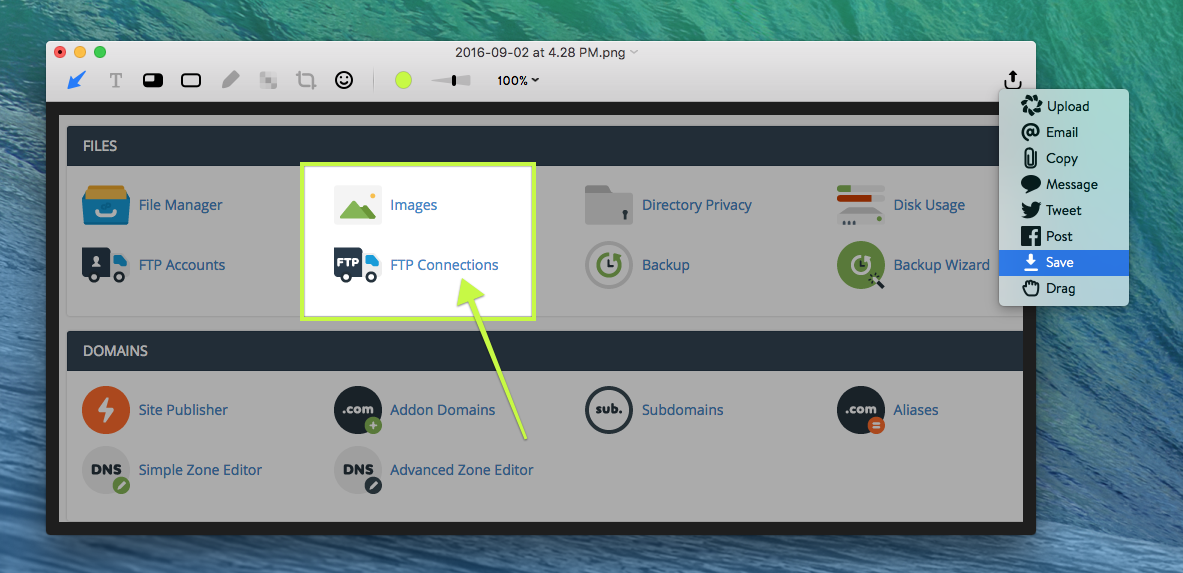
^Annotate allows you box out the part of a screenshot that you’re wanting to focus on. This is most useful in showing a customer where to click inside of their account. I love that it still keeps the rest of the screenshot visible so the viewer can keep their whereabouts, but still hones in on the important part of the screenshot.

^Another favorite Annotate feature is the blurring out tool. I’m sure it’s assumed, but this is helpful for writing tutorials or support tickets where you need to screenshot a window that has holds private information. This screenshot also exemplifies the arrow and text features.
How to Use Annotate
Once installing Annotate on your computer, you want to start first by making sure the app is live on your desktop:
Annotate does a pretty good job of providing a beginner’s how-to after install, but essentially you’ll want to press command + shift + 5 on your keyboard. This pulls up the capturing cursor (looks identical to a normal command + shift + 4 screenshot cursor) & you can take the screenshot like normal:

^(Ooo screenshot within a screenshot!)
^Once you take the screenshot, Annotate opens up with a tool bar above the photo.

After editing, press the icon in the top right corner and click save to save it to your desktop.
Annotate + Zendesk
To take it one step further, Annotate can be integrated right within our support system called Zendesk. This is awesome because I can pull my screenshot into a support ticket striaght from the Annotate window:

^At the point of saving, click Upload.

^You can search the number of the ticket you’re responding to, choose whether you want to send it publicly or internally, add a comment & then press send.

^ Pretty slick!
My only criticism with the Zendesk integration is you can’t just upload it publicly/internally to your support ticket, you have to upload and send it publicly/internally. Meaning that in tickets that are text-heavy or have multiple screenshots, sending through Annotate really isn’t the best option. Furthermore, if you do decide to send the screenshot publicly with a comment, it doesn’t add your custom Zendesk signature to the end of your response.
So for simple support tickets, the Zendesk upload feature works pretty well. For more detailed support tickets however, it makes more sense to save to your desktop & then upload into the ticket manually.
That being said, for what the Annotate app is meant to do, it works flawlessly. Try it for yourself: https://annotate.driftt.com/annotate