
See the post on Community Forums here.
Signing up for a Reclaim Hosting account and domain for the first time is pretty straight forward, but what about when you want to add a second domain to your account? It can be a little confusing to understand the different steps and requirements, so this post is here to set the record straight:
Understanding pricing:
When first signing up for a Reclaim account, you purchase a hosting plan. (The student/individual plan is $25.00, so we’ll move forward with that in this example.) And since Reclaim is awesome, the $25.00 also gets you a free domain registration. Additional domains, however, are each $12.00 per year.
Note that you do not need an additional hosting plan when you purchase an additional domain. You can obviously add hosting if you want, but it’s not necessary. The only time you really need to mess with or adjust your hosting plan is when you’re running out of space and you need to upgrade to a larger plan.
So if you’ve got an student/individual hosting plan with two domains, your renewal price for everything each year will be $25 + $12 = $37.00.
Registering the additional domain:
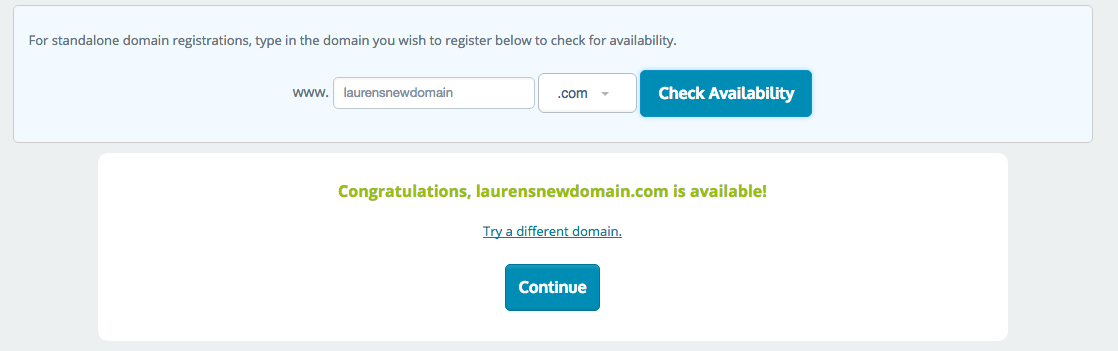
Once logging into your Client Area portal, you’ll want to go to Domains > Register a new domain:

Type in the domain that you want and click Continue.

Next you’ll be brought to a Domains Configuration page where you can choose to protect your domain by adding the ID Protect add-on. It’s $7.00 extra a year, and you can learn about why its important here.
On this page you should also see the following window:

This is correct. The No Hosting! Click to Add warning is slightly misleading- you do have hosting, its just currently attached to your first domain.  Press onwards and click continue at the bottom of the page.
On the review and checkout page, you should see the domain registration for 1 year, and the ID protection if you’ve chosen to add that:

Scroll down, enter your payment information and click Complete Order.
Setting up your new domain:
It’s natural to think that after you purchase your second domain, you can begin using it right away. Well you’re not technically wrong, but it’s important to follow one more step- adding the domain as an Add-On Domain in your cPanel account.
Add On Domain is basically a term cPanel uses when it’s talking about a secondary domain or any additional domains after your first registration. In order to use your additional domain, you essentially have to tell your cPanel that you are the new owner of said domain.
To do this, log into your cPanel. Go to the Domains section and click on Add-On Domains:

From there, add your recently purchased domain to the first field- you’ll notice that the second and third fields will automatically populate when you click outside the space:

^I always remove the “.com” from the document root field to keep things consistent in my file manager, but it’s not necessary.
Note: a subdomain will automatically be created with your new add-on domain. This is a feature that cPanel insists upon, so it can’t be deleted or altered. If you don’t plan on using it, just disregard.
Click Add Domain and you’re golden! Now you’ll be able to work with your new domain like normal within your account.
site:.edu I really like and appreciate your blog post. Much obliged.